Valid from October 1, 2018
Getting Started
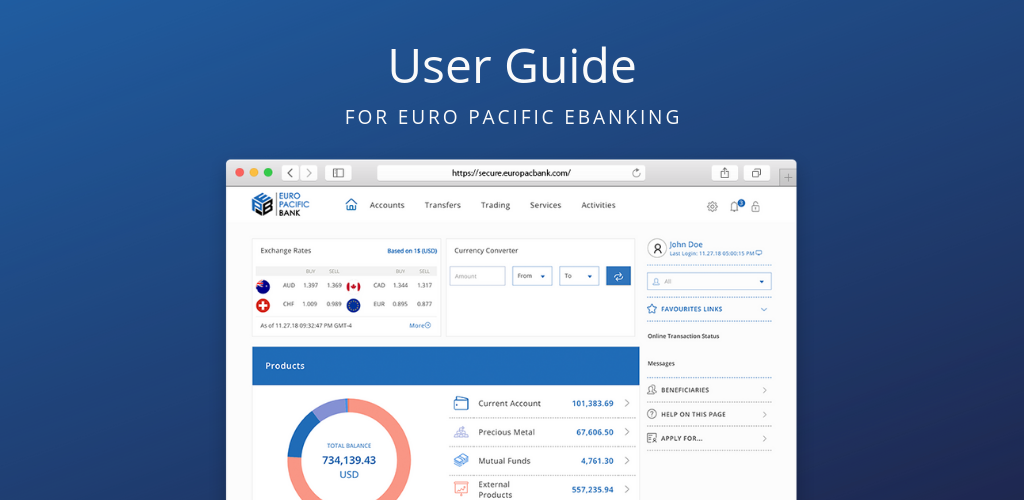
Personalize your Home screen
The Home screen presents you with a consolidated summary of your accounts, including:
- Account Balances
- Daily Exchange Rates
- Currency Converter
To return to your Home screen, click the at the top of the screen.
To customize your Home screen, click the in the upper right corner of your screen and select Dashboard Personalization.

Nickname your Accounts
To create nicknames for your accounts, click the in the upper right corner of your screen and select Account Personalization.

You can also define the order in which your accounts are listed throughout eBanking using the Priority column.
Manage your Favourites
You can maintain quick access to your favorite functions using the Favourites Links section.
To choose your Favourites, click the in the upper right corner of your screen and select Manage Favourites.

Language Settings
At this time, eBanking is only available in English. Please be patient with us as we work on additional language support in the future.
Update Phone Number
To change your phone number, click the in the upper right corner of your screen and select Update User Details.
Enter your new phone number, select its Country Code, and click Get verification code. You will receive an SMS message with the verification code. Enter the code and click Submit.


Security
Enable Two-Factor Authentication (2FA)
What is Two-Factor Authentication?
Logging into your eBanking and authenticating transactions requires a one-time code, also known as Two-Factor Authentication (2FA). We provide two types of 2FA:
- SMS Verification: Sends a text message to your phone number of choice.
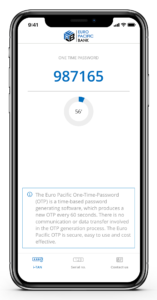
- Mobile OTP (mOTP): An iOS and Android application that generates one-time codes, replacing SMS Verification.
SMS Verification is enabled by default, and required when you log into eBanking for the first time. However, please upgrade to mOTP as soon as possible, as it is more secure and convenient for you.
How to configure mOTP on your device:
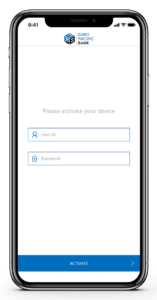
- Download the application on the Apple or Google Play App Stores, depending on your device.


- Login to Euro Pacific eBanking, select the in the top right hand navigation, and choose mOTP Activation.

- Install the mOTP App on your device and login to the application using your eBanking username and password.
- Select the Serial No. tab in the bottom navigation bar of the App and enter the unique serial number on the mOTP Activation page in your eBanking.
- Navigate back to the I-TAN tab in your App and enter the most recent code into Insert mOTP Code in eBanking.
- Submit the form in eBanking, confirm, and the App will be registered.
Once the App has been registered in eBanking, SMS Verification will be automatically disabled and replaced with mOTP. Future verification code requests in eBanking will require the code from your device’s mOTP App.
Manage your Devices
You can manage all the devices authorized to log into your eBanking. Click Manage Device in the icon to view your devices.

Your devices are separated into two types:
- Saved Devices
- Blocked Devices
Whenever you log into eBanking from a non-Saved Device, you are presented with the option to save it. If you save the device, it will be listed under Saved Devices, which are whitelisted devices known to you and used routinely to log into eBanking.
Each time you login from an unknown device, you will be notified via email and/or SMS and are presented with the option to block that device. These devices will be listed under Blocked Devices.

Customize your Alerts
You can manage which actions in eBanking you will receive email and SMS Alerts for. Some Alerts may be set by the Bank administrator as mandatory, and therefore cannot be modified or disabled.
Some of the SMS and email Alerts you’ll be able to manage include:
- New Customer Message
- International Transfer
- Pending Authorization
- Card Top Up
- Support Center Cases
- and more
Manage your alerts by clicking the and selecting Manage Alerts.


Change your Password
You can change the password used to log into eBanking. For your security, the password must meet all of the following criteria:
- Must be at least 10 characters long.
- Must contain at least one number (0-9).
- Must contain at least one upper case letter (A-Z).
- Must contain at least one lower case letter (a-z).
Change your password by clicking the and selecting Change Password.

Change your Security Questions
You can change the Security Questions used to validate your identity when logging into eBanking.
Change your Security Questions by clicking the and selecting Change Security Questions.
Answer at least three questions of your choice and click Send me a SMS code. Enter the provided code to validate and save your changes.
Change User Permissions
If your Euro Pacific Bank account has multiple eBanking users, you have the ability to change each user’s Permission Levels based on your security requirements.
The most common Permissions Level change is requiring a secondary user to authorize transactions, also known as “dual authorization”.
Please follow these instructions to adjust each user’s Permission Levels for these supported transaction types: International, Between Own Accounts, other Euro Pacific User, and Card Top Up.
Change User Permissions Form
1. Download and complete the Change User Permissions form. Once complete, please send it to us via Support Center case.
2. If you need assistance completing the form, feel free to Schedule a Call with our Client Services team.
3. Please note that this form supports most permissions scenarios, but not all. If you need more specialized Permission Levels, please contact us for changes on demand.
Request your transaction
Once we have processed your Change User Permissions request, you may submit a transaction to “test” your new permissions. For example, if User A only has input authority and User B has Approve Only or Full Access, please have User A submit the transaction and User B login to approve the transaction.
User B can approve the requested transaction using the instructions below.
Authorize your transaction
If a transaction was submitted pending authorization of another user, the approving user should follow the instructions below:
1. Log into your eBanking and click Pending Authorization on the in the upper right corner of your screen.

2. Select the appropriate account and then click to retrieve your transaction data.

3. Your transactions Pending Authorization should be listed, and you can approve or decline them by clicking the buttons under the Action column. Click the arrow on the right of the transaction to expand and view the transaction in its entirety.

4. Once you have made your approve and decline decisions, click the Submit button.

5. Finally, click Confirm.

Customer Service
Create a Case
A Case is a secure and organized conversation between you and our dedicated customer service team, Client Services.
You can create a Case in your eBanking by clicking the in the upper right corner of your screen and further clicking Support Center.

Click Create New Case.

Note: The eBanking Support Center has replaced Messages as the primary method of communicating with us. However, the Messages module will remain available so we can send informational updates and notices to you, as well as for you to read previous message threads.
View your Cases
You can view all of your Cases in your eBanking by clicking the in the upper right corner of your screen and further clicking Support Center.
Click All Cases to view all your Pending and Resolved Cases.

Click the Case ID to open the Case.
Resolve your Cases
Inside Support Center, click the Requires Action tab to view all cases that require your action, for example providing documentation or an explanation.

Click the Case ID to view your case’s status and your outstanding action items in the Required Actions tab.

In each Required Action, you will find:
- Initial Case Information – this is an overview of what is needed from you
- Case Comments – this is a list of past comments
- Attachments – files pertaining to the case, if any
- Comments for Bank Associate – draft your reply here


Change your address
In the Apply For menu on the right side of your screen, click Request for change of address and complete the form.

We will attempt Electronic Verification of your address. If we are unable to complete Electronic Verification, please provide a Certified Proof of Address.
Open additional Current Accounts
You can open additional Current Accounts in various currencies. In the Apply For menu on the right side of your screen, click Open a New Account and complete the form.

Add a new Account Signatory
In the Apply For menu on the right side of your screen, click Add a Signatory and complete the form.

Remove an Account Signatory
In the Apply For menu on the right side of your screen, click Remove a Signatory and complete the form.

How to close your Account
If you would like to close your entire relationship with Euro Pacific Bank, please create a Case in your eBanking by clicking the in the upper right corner of your screen and further clicking Support Center.
If you want to merely close some of your Current Accounts, but not all, please complete the account closure form by clicking on the Apply For menu on the right side of your screen, click Account Closure Request and complete the form.

Account Information
View your Accounts
The Accounts Overview lists all of your accounts, balances, and possible actions. It is separated by account type, composed of:
- Current Accounts
- Brokerage Accounts
- Card Accounts
The Accounts Overview can be found in the Accounts menu.

Clicking the icon next to each account displays several available actions, which vary based on the account type.
Actions available for Currency Accounts:
- Make a Transfer
- View Transaction History
- View Account Details
- View Electronic Statements
Actions available for Brokerage Accounts:
- Transfer Out
- Transfer In
- View Account Details
- Open Trading Platform
- View External Positions
Actions available for Bank Cards:
- Top-up Card
- Block/Unblock Card
- Report Lost or Stolen Card
- New PIN Request
- View Transaction History
- Card Account Details
View your Transaction History
The Transaction History screen presents a list of all transactions made per account.
It can be found in History in the Accounts menu.

Define your search criteria and then click to retrieve your transaction data.
View your Transaction Status
The Online Transaction Status screen presents all transactions and activities, whether Pending or Completed.
Define your search criteria by account(s) and period. More advanced filtering options are available by clicking Filter Options.

View and download your Electronic Statements
View and download your official account statements by clicking E-statements in the Accounts menu.
Define your search criteria by account and period, and click .

Note: This type of statement is only available from October 2018 on the month eBanking was launched. However, you may view your full list of historical transactions using the Transaction History screen, found in the Accounts menu.
Transfers
How to receive an International Transfer (SWIFT)
Please use these standard incoming wiring instructions. We recommend you bookmark and reference the link, as opposed to saving it as a PDF, to ensure you have the most up-to-date instructions.
Once the funds arrive in your Euro Pacific Bank account, you may be asked to fulfill standard due diligence requirements, in compliance with international regulations.
Important
- Before executing the transfer, please review our Incoming Wire Transfer Disclaimers.
- If you encounter any challenges, please contact us via Support Center case.
How to send an International Transfer (SWIFT)
Send an international SWIFT transfer by clicking International in the Transfer menu.

A list of Saved Beneficiaries is presented. If you are transferring to a Saved Beneficiary, please proceed to the next empty field.
If you are transferring to a new destination, select New Beneficiary.

You will be asked to complete the rest of these fields:
- Beneficiary Name
- Account Number/IBAN
- BIC/SWIFT
- Amount
- Currency
- Transaction Date
- Transaction Description
- Charges to be paid (OUR, SHA, BEN)
- Reason for Transfer
- Supporting Documentation
- Recurring
Transfer between your Own Accounts
Transfer between your own accounts by clicking Between Own Accounts in the Transfer menu.

You will be required to input:
- The currency of the transfer, displayed next to the Amount field.
- The Transaction Date. The current date is set by default. A future date can be set up to 90 days after the current date.
- You have the option of setting up your transfer as Recurring. If enabled, additional fields are loaded for your input.
Click Submit to request the transaction. You can check the status of your transaction in the Online Transaction Status under the Activities menu.
Note: Transferring funds between two Current Accounts denominated in different currencies is effectively a “currency conversion”, as previously known. Second, to transfer funds to/from your Brokerage Account, please read this article.
Transfer to/from your Brokerage Account
Transfers to/from your Euro Pacific Trader (EPT) brokerage accounts are done by clicking Between Own Accounts in the Transfer menu.
1. Select your From Account, which is the bank account you’d like to use to fund your EPT account.
2. Select your To Account, which is your EPT account.
Please note that you may have multiple EPT accounts to choose from, all in different currencies. Please select the EPT account in the currency that you would like to fund.
Tip: To reduce confusion, we recommend that you Nickname Your Accounts for easy reference. You can view all of your account numbers at Accounts > Overview.
3. If you would like to fund a certain currency but do not have an EPT account in that currency, please go to your Messages and create a case stating you’d like to have that currency enabled for EPT funding.
For example, if you’d like to fund your EPT with HKD for the first time, you must ask us to enable your eBanking to allow HKD funding of your EPT.
4. Next, you will be required to input:
- The currency of the transfer, displayed next to the Amount field.
- The Transaction Date. The current date is set by default. A future date can be set up to 90 days after the current date.
- You have the option of setting up your transfer as Recurring. If enabled, additional fields are loaded for your input.
5. Click Submit to request the transaction. You can check the status of your transaction in the Online Transaction Status under the Activities menu.
Tip: If you are attempting to convert cash inside of your Euro Pacific Trader account, you will simply need to do two internal transfers. First transfer the cash into your bank account, and then transfer it back to your brokerage account using the intended EPT account.
For example: You want to convert USD to EUR inside your Euro Pacific Trader account. Transfer USD to your bank account. Once it is processed, transfer that USD into the EUR Euro Pacific Trader account. This is a total of two transfers.
Transfer to Other User at Euro Pacific Bank
Transfer funds to another user’s Euro Pacific Bank account by clicking Euro Pacific Accounts in the Transfer menu.

A list of Saved Beneficiaries is presented. If you are transferring to a Saved Beneficiary, please proceed to the next empty field.
If you are transferring to a new destination, select New Beneficiary.
You will be asked to complete the rest of these fields:
- Beneficiary Name
- Beneficiary’s Euro Pacific Bank account number
- Amount
- Transaction Date
- Description
- Reason for Transfer
- Supporting Documentation
Create a Recurring Transaction
Create new recurring transactions, view a list of existing ones, and amend them from the Recurring Transactions screen in the Transfers menu.

The Recurring Transactions Maintenance page presents you with a list of your Recurring Transactions and the option to create, update, or cancel them.
Only active Recurring Transactions are displayed. Expired records are not displayed.
Create a Mass Payment
One of eBanking’s newest features, Mass Payments allows you to make bulk transfers for transfer types International, Between Own Accounts, and other Euro Pacific Account, as well as bulk Card Top Up.
This means that you’ll be able to request transfers to multiple accounts and/or beneficiaries simultaneously using a CSV file.
Prepare your Mass Payment Form
1. Download the CSV file for your intended Mass Payment type:
2. Complete your form by overwriting the example text. Here are some important considerations for each form:
International
- Column A: Please ensure the transfer code “T_INT” is included in every row that contains data.
- Column F: Two-digit country code.
- Column G: Beneficiary Bank BIC code without the “XXX” at the end, the way it is displayed in the standard International Transfers BIC lookup screen.
- Column H: Intermediary Bank BIC code (if applicable) without the “XXX” at the end, the way it is displayed in the standard International Transfers BIC lookup screen.
- Column I: Transfer amount in numerical form based on your eBanking user preferences, e.g. 1000.00 or 1000,00
- Column J: Three-digit currency code of the payment.
- Column K: Charging Code should be OUR, BEN, or SHA only.
- Columns L-O: Optional Reference lines 1-4. Maximum of 35 characters per line. This information will be added to your transfer’s SWIFT Reference section.
- Column P: Please complete this mandatory Reason for Transfer field for compliance purposes.
Between Own Accounts
- Column A: Please ensure the transfer code “T_OWN” is included in every row that contains data.
- Column C: Transfer amount in numerical form based on your eBanking user preferences, e.g. 1000.00 or 1000,00
- Column D: Three-digit currency code of the payment.
- Column E: Optional description text.
Euro Pacific Accounts
- Column A: Please ensure the transfer code “T_OTH” is included in every row that contains data.
- Column D: Transfer amount in numerical form based on your eBanking user preferences, e.g. 1000.00 or 1000,00
- Column E: Three-digit currency code of the payment.
- Column F: Optional description text.
- Column G: Please complete this mandatory Reason for Transfer field for compliance purposes.
Card Top Up
- Column A: Please ensure the transfer code “T_CTU” is included in every row that contains data.
- Column C: Optional description text.
- Column D: Transfer amount in numerical form based on your eBanking user preferences, e.g. 1000.00 or 1000,00
- Column E: Three-digit currency code of the payment.
3. Save the form.
Request your Mass Payment
1. Inside your eBanking Transfers menu, click Mass Payments.

2. Select your From Account.
3. Select the File Type, which is CSV by default.
4. Add optional Description text, which will be recorded in your transaction History and E-statements.
5. Upload your file and click Submit.
Authorize your Mass Payment (if applicable)
If your eBanking permissions require an Approver to authorize the Mass Payment request, please follow the procedures below.
1. Once your Mass Payment form has been uploaded and submitted, the Approver signs into their eBanking and opens the Batch Authorization page. Find Batch Authorization by clicking the in the upper right corner of your screen.

2. On the Batch Authorization page, search for the bank account where the Mass Payment was requested from.

3. In the results, find your Mass Payment and click the button under the View column. This will display your Mass Payment, itemized by transaction.
4. You may now individually Approve or Decline each payment by clicking the check mark under the Actions column.
5. Once you have reviewed all payments and approved/declined them accordingly, click the Submit button. Click Confirm to finalize.
Check your Mass Payment Status
Mass Payments currently require a manual bank approval during bank business hours.
1. To check the status of your Mass Payment, click on Batch Transaction Status under the Activities menu.

2. Select the appropriate Account and Period and click to retrieve your transaction data.

3. Your Mass Payment(s) will be displayed accordingly. Click the icon under the Actions column to view the status of the transaction.

Create and maintain a Beneficiary template
When transferring funds to a third party, eBanking allows you to save and maintain the Beneficiary information for future payments. Beneficiaries can be created in advance or when the transfer is requested.
When the third party transfer is requested, you’ll be able to select the Beneficiary from a list of Saved Beneficiaries.
View the Beneficiaries screen by clicking Beneficiaries in the Transfer menu.

Note: Wire transfer Beneficiaries was previously known as a “Saved Wire Template”.
Pay your Account Maintenance Fees
Pay your current account maintenance fees by clicking Payment in the Transfer menu.
You will be required to input:
- The type of Service/Fee, which would be Maintenance Fees (Individual) or Maintenance Fees (Corporate)
- The payment method of Bank Account or Credit Card
- The current account the payment is for
Click Submit to initiate the payment. You can check the status of your payment in Online Transaction Status under the Activities menu.
After we process your payment, you will see the transaction in your History, found in the Accounts menu.
Bank Card
Order a New or Replacement Bank Card
Tip:
View our full Bank Card fees and conditions here.
In the Apply For menu on the right side of your screen, click New Card Request and complete the form.
The Courier Shipping is optional, but encouraged if you would like faster shipping, do not have reliable local post, and/or require a tracking number. Couriered bank cards will be delivered within 2-3 weeks.
Bank Cards delivered via Regular Mail does not provide tracking, therefore we cannot provide an estimated delivery time. Regular Mail ships from the UK.

Important Notes:
1. For all accounts, the name imprinted on your card will be your first and last name. The address listed on your bank profile will be your Shipping Address.
2. When ordering additional bank cards for other signatories, please use an email address that is different from the one registered on your first bank card. Every card order requires a different email, otherwise our card supplier will not accept the order.
Activate your Bank Card
Find your Bank Card in the Accounts Overview in the Accounts menu.
Clicking the icon next to your Bank Card displays Activate Card, which requires you to input your card details for validation.
Request your PIN
Note: Your Bank Card must be activated to request a PIN. If you’re unsure if your card is already activated, please read our User Guide article Activate Your Bank Card.
If your card is already activated with a PIN and you simply want to request a new PIN, find your Bank Card in the Accounts Overview in the Accounts menu. Clicking the icon next to your Bank Card displays New PIN Request.
- Go to the Card Portal.
-
On the login page, enter your SAN or Email and Access Code. Your SAN number can be found on the back of your card.
DON’T HAVE YOUR ACCESS CODE?
- If you don’t know your Access Code, click the “Forgot Access Code?” link below the login button.
- Enter your Card Number or SAN and the Email you registered when ordering your card.
- You will receive an email with your Access Code.
- Return to the login screen and enter your Card Number or SAN and Access Code.
- Select the Manage My Account tab and choose the Retrieve My PIN option.
- Review the disclaimer and select Continue to view your PIN.

Load your Bank Card
Load your Bank Card by clicking Card Top Up in the Transfer menu.

Note: All Card Top Up requests currently require manual approval by our Operations team. Approvals are made only during bank business hours, which are Monday to Friday, 8am to 4pm (UTC – 4:00). Please plan ahead accordingly.
We appreciate your patience as we move to automatic Card Top Up in the coming months, when further developments are made to your eBanking platform.
Block/Unblock your Bank Card
Find your Bank Card in the Accounts Overview in the Accounts menu.
Clicking the icon next to your Bank Card displays Block Card, which requires you to input your card details for validation.
Report your Bank Card Lost or Stolen
Find your Bank Card in the Accounts Overview in the Accounts menu.
Clicking the icon next to your Bank Card displays Report Lost or Stolen Card, which requires you to input your card details and reason for validation.
Once the request is submitted, your Bank Card will be set to Inactive status so that further transactions will be blocked.
Trading & Investing
Open a Euro Pacific Trader account
TEMPORARILY NOT ACCEPTING NEW APPLICATIONS
We are currently placing Euro Pacific Trader applications on hold due to administrative changes at Interactive Brokers1, our brokerage custodian and technology provider. We hope to resume processing applications soon, and will notify you here when we do.

Euro Pacific Securities Inc. presents its premier multi-asset brokerage account, Euro Pacific Trader. You’ll be able to access stocks, options, futures, forex, fixed income, and ETFs through your choice of four powerful platforms. Click the Euro Pacific Trader product page to view the product listings, commissions, and available platforms.
Apply for a Euro Pacific Trader account by logging into your eBanking and completing the Open Euro Pacific Trader account form in the Apply For menu. After submitting your application, one of our Compliance team members will reach out to you shortly to walk you through the remaining steps.

Invest in gold and silver
The Precious Metals Account provides the security of physical precious metals and the convenience and access of an online bank.
Easily convert cash in your bank account into physical gold and/or silver holdings by following the steps below.
1. In the Trading menu, click Buy/Sell and Precious Metals Trading.

2. Select the type of metal you would like to own (XAU or XAG) and enter the weight or cash amount.
3. Select which Account to Debit from, which can be any of your available currencies.
4. Select your order amount by Quantity (ounces) or Amount (currency) terms. If you choose an Amount-based order, you will also need to select the currency of that Amount.
Note: The Amount currency is relevant when viewing your Trading Movements screen, which displays your historical precious metals trades. Those trades will be denominated in the currency of your Amount during the trade.
5. You will receive a confirmation of your order and we will process the order as soon as possible, typically within 1-2 hours on business days.
6. After the trade has been executed, the cash will be debited from your bank account and your precious metals holdings will be visible in your Accounts Overview.
At any time, you may liquidate a portion or all of your precious metals holdings using the same process outlined above, and your cash proceeds will be deposited back into your bank account immediately.
Purchase a mutual fund
In the Trading menu, click Buy/Sell and Mutual Funds Trading.
We offer four unique, professionally-managed Mutual Funds. To discuss if mutual funds are suitable for diversifying, protecting, and growing your wealth, contact us to schedule a call with one of our Sales & Trading associates.

Converting cash inside your Euro Pacific Trader account
If you are attempting to convert cash inside of your Euro Pacific Trader account, you will simply need to do two internal transfers:
- First transfer the cash into your bank account.
- After the cash settles in your bank account, transfer it back to your brokerage account using the EPT account of the currency you’d like us to deposit into your Euro Pacific Trader.
For example: You want to convert USD to EUR inside your Euro Pacific Trader account. Transfer USD to your bank account. Once it is processed, transfer that USD into the EUR Euro Pacific Trader account. This is a total of two transfers.